Acoustic Treatment for Your Home Recording Studio
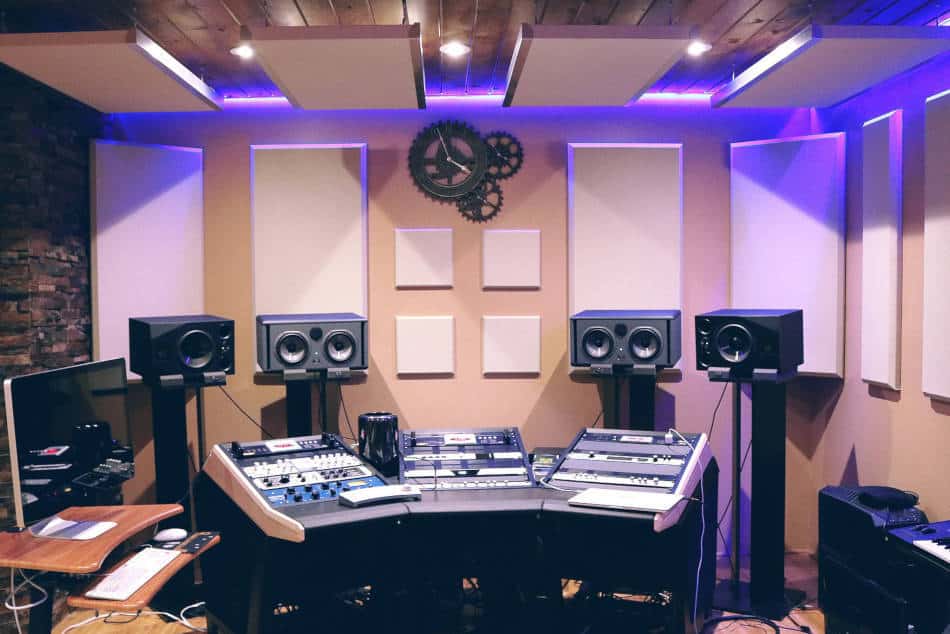
Something people often wonder about in a recording studio is the material attached to the walls, plus the strangely shaped objects standing in the room and fixed in the corners where the ceiling meets the walls.
These materials and objects are there to provide acoustic treatment. This is designed to control the way sound waves move around the room and reflect off the walls, ceiling and floor.
In a small home studio this acoustic treatment might involve carpets, curtains and egg boxes stuck to the walls. A large, expensive, studio will use specialist acoustic treatment, which will involve acoustic panels attached to walls and ceiling, together with diffusers and bass traps in various places.
We’re going to have a look at what acoustic treatment involves and why you might want to think about setting some up in your home recording studio.
Helps You to Hear the Sound from Your Speakers
Acoustic treatment can seem unnecessary, and you might think that it makes your studio look untidy. However, once you have completed the writing and recording of your track, trying to get it sounding right can be quite frustrating.
Acoustic treatment helps to make sure that the sound coming out of your speakers isn’t being adversely affected by the space you are hearing it in. You can spend a lot of money on studio monitor speakers, so it’s important to make sure that sound reflections from surfaces in the room aren’t going to distort what you are hearing.
Since we are focusing on home studios you will probably be recording, mixing and mastering in the same space. Many home studios are set up for writing and recording, but not so much for listening.
Listening is critical when you are mixing and mastering your productions, so you need to think about how sound waves coming from your speakers are reflected or absorbed by the surfaces in the studio.
What Is Acoustic Treatment?
When people see the egg boxes, carpet, or specially designed acoustic panels attached to the walls of a recording studio they sometimes think it is there to provide soundproofing.
In many situations soundproofing could be important, and you can think of it of as a kind of acoustic treatment. However, acoustic treatment usually involves trying to control the way sound waves travel in the space and are reflected from the walls of the studio.
Acoustic treatment is achieved by attaching absorbent surfaces to walls and ceilings, and placing objects in the room to diffuse sound waves. This helps to reduce reflection of sound waves, which can lead to the amplification or attenuation (reduction in volume) of certain frequencies.
Why Is Acoustic Treatment Important in a Recording Studio?
There are three main reasons why you might want to apply acoustic treatment to your home studio to help control the sound in the room:
Soundproofing to Stop Sound Getting in or Out
Since we’re only taking a general look at acoustic treatment for the home studio we will take soundproofing as a kind of acoustic treatment.
There are two main reasons that you might want to soundproof your studio. The first is to keep sound from getting out, and the second is to prevent sound getting in from outside.
Having your recording studio in your home lets you work at whatever time you like. However, other people you live with, or your neighbors, might not appreciate listening to the same section of a track over and over again as you try to get it right.
Soundproofing is also important when you are recording using a microphone as the external noise could be picked up. It’s difficult to remove this external noise from a recording once it’s in there.
External noise can be a problem when you are mixing or mastering your productions. You need to be sure that what you hear is only coming from your speakers, and sounds from outside can interfere with this.
External Noise When Recording Using a Microphone
We just talked about how sounds coming in from outside your studio can interfere with recording using a microphone. The way that sounds are reflected from the walls (and floors and ceilings) of your studio can also affect this.
You have probably read or heard people talking about “the sound of the room” when they are recording vocals and instruments using microphones. Acoustic treatment lets you control the sound of the room so that you can capture the performance you want.
Interference with Mixing and Mastering
Mixing and mastering are usually two separate activities in the production of your final recorded piece, but they both require listening carefully to the sound coming from your speakers.
Studio speakers for mixing and mastering usually need to have a “flat frequency response”. This means that they don’t emphasise or minimize any parts of the sound frequency range.
Sound waves reflecting from surfaces in the studio can increase or decrease the volume of particular frequencies. This can give you a false impression of what is actually coming out of the speakers, making it very difficult to balance the sound correctly.
What Sort of Acoustic Treatment Is Available?
The aim of acoustic treatment is not to create a room where all sound reflections and reverberation are eliminated. That would result in a room with a very unnatural “dead” sound.
This could be just as big a problem as a room that enhances or diminishes certain frequencies, so the aim is to produce a room that has a neutral effect on the sound balance.
The two main aspects of acoustic treatment are absorption and diffusion. Although the words are fairly self-explanatory, we’ll have a quick look at what each approach is aimed at achieving.
Absorption
Absorption of sound waves can be achieved with materials that have a soft surface. This can absorb the sound waves hitting it and prevent them being reflected back into the room.
Covering walls with material like carpet or egg boxes (an old favorite in home studios) can reduce the reflection of high to medium frequency sound waves. However, lower frequencies can pass straight through and be reflected off the wall (and through the absorptive material again) and back into the room.
Having soft furnishings in your studio can help to absorb some of these lower frequencies. For example, chairs, sofas or even your bed in your bedroom studio can help with this.
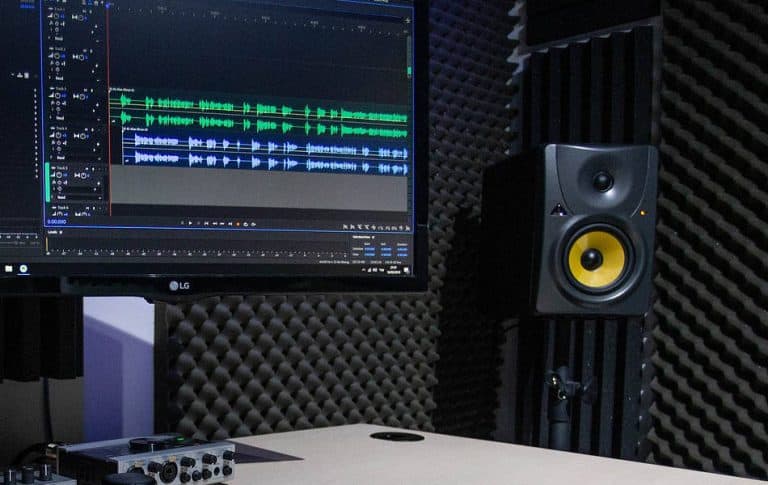
You can buy specially made panels covered with absorptive material for mounting on the walls of your studio. It’s also fairly easy to make suitable panels using acoustic foam, or other similarly soft material.
These types of panel are sometimes called “traps” since they absorb the sound waves and prevent them being reflected. Bass traps, that absorb low frequency sounds, need to have a thicker layer of absorptive material. Some bass traps employ more than one layer of soft material for optimal absorption.
We often have an image of the ideal recording studio as a room that is empty apart from a recording desk and some instruments. Although this looks very slick and professional it would make controlling sound reflections quite difficult.
Diffusion
Since it’s hard to control low-frequency sound waves using absorptive materials on walls and ceilings (not forgetting floors too), you will probably need to diffuse sound waves in addition to trying to absorb them.
Diffusion employs irregularly shaped objects that reflect the sound waves in various directions. This helps to prevent sound waves reflecting back and forth from wall to wall, and back again, which can lead to reinforcement of some frequencies and diminishing of others.
Specialist diffusers can be purchased for acoustic treatment of your studio. These can be attached to walls or used as free-standing units. DIY options include furniture or anything else in your studio that would reflect sound waves in random directions.
Dedicated Home Studio or Multi-Purpose Room?
There are many different types of home studio, but the thing they all have in common is that they are in the producer’s home.
Something you have to think about when planning your acoustic treatment is whether you studio is exclusively for production purposes, or whether it needs to double as your bedroom or living room.
If it’s a multi-purpose room then you may be limited in what you can do in terms of acoustic treatment. This is because you will probably have to pack away at least some of your gear when the room goes back to “normal” use.
However, this type of studio is more likely to have curtains and contain other furniture, which can help to absorb and diffuse sound waves. Also, you can make or obtain portable acoustic treatment equipment, which can be stored when not being used.
If you have a room that can be used as a dedicated studio then this will make things much more straightforward. You can obtain and install all the equipment needed for soundproofing, absorption and diffusion, and leave it in place.
Designing Your Acoustic Treatment
You can’t really create an acoustically effective home studio space just by trial and error alone. You won’t usually know that the sound you hear doesn’t truly represent what’s coming out of the speakers, or recognise problem frequencies just by listening.
You will need to apply some acoustic treatment theory when you are putting it all together. One frequent heard piece of advice is to divide the room into two, from front to back. In this set up the front end is the “dead end” and the back end is the “live end”.
Dead End of the Room
At the front end (the dead end) you will have your monitor speakers, usually either side of your computer and mixing equipment. You probably already know that your head and the two speakers should represent the three angles of an equilateral triangle.
The speakers in the arrangement above are pointing straight at your ears, and the sound is coming directly towards them. However, sound waves from the speakers are also going out in other directions too.
If the walls at this end of your studio are untreated then these sound waves are very quickly reflected and mix with the sound reaching your ears directly from the speakers. This can cause interference and affect the clarity of the sound that you hear.
To prevent this happening you can apply absorption panels to the wall behind the speakers and the walls either side too. These panels absorb the reflected sound waves so that you get a clearer idea of the sound coming from the speakers. This is why it is called the “dead end” of the room.
Live End of the Room
The other end of the room, behind you when sitting at your computer and mixing equipment, is the “live end”.
Since the sound waves have traveled a longer distance from the speakers to reach this end of the room, the reflection of the sound from surfaces here are usually less problematic. In addition, using absorption panels on the walls at this end of the room to absorb the sound waves could deaden the overall sound of the room.
The aim here is to prevent the sound waves being reflected back and forth between the walls, creating standing waves, which can lead to interference with the sound being heard. A good solution is to use diffusers at the live end of the room to reflect sound waves in random directions.
Ceiling-Mounted Acoustic Panels
It’s often forgotten that sound waves don’t just travel around your studio horizontally – they also travel vertically. This means that sound waves from you speakers travel up towards the ceiling and down towards the floor too.
If you have a carpet on the floor this can help to absorb sound waves, although we have already seen that low frequency sounds can pass through the carpet and be reflected from the floor beneath.
In most studios the ceiling will be a flat reflective surface. This means that sound waves coming from the speakers, plus those that have been reflected up from the floor, can be bounced back and forth. These standing waves can produce interference and interference in the sound.
Your desk, chair, audio equipment and other furniture can act as diffusers to help avoid this sound reflection from the floor. Acoustic panels can be attached to the ceiling in the area above the speakers to prevent reflections and further deaden this end of the room.
Acoustic Treatment for Windows
If your home studio is in a room that has one or more windows then you will need to think about acoustic treatment for this too.
From a soundproofing point of view, windows can allow sound to enter easily from outside. This can be picked up in recordings and also interfere when you are listening to your speakers when mixing or mastering.
Windows also provide a flat surface that can reflect sound waves back into the room, causing interference. Fortunately, low frequency sound waves can pass straight through the glass in the window, so reflection of these sounds is less of an issue here.
High frequency sounds can be absorbed using drapes or curtains, which can easily be pulled across the window as required. Low frequency sounds from outside will pass through the curtains into the studio, so absorbent panels can be placed over the window to block this sound if necessary.
Calculating How Much Acoustic Treatment You Need
It’s important to know how much acoustic treatment you need in your studio. Too little and it won’t be effective. Too much could cost you more than you need to spend, and deaden the sound of the room too much.
Fortunately, there are online calculators and other resources available that can help you to work out how much acoustic treatment you need. Check out our resources and recommended gear section for more information.
Software for Evaluating Acoustic Treatment
It can be very difficult to assess the effect your studio is having on the sound you hear. You could try listening to your production using headphones and compare this with the sound you hear in the room from your speakers.
You probably know that headphones can also affect the sound you hear by emphasizing certain frequencies, which introduces other issues. You can obtain software that will flatten the frequency response (evening out the volume across the frequency range) which helps with this.
There is software available that will analyze the way your studio could be affecting the sound coming from your speakers. You use a microphone to capture the sound that is produced by the software. The sound captured by the microphone is analyzed to provide information on what the room is doing to the sound.
Some of the best examples of this type of software are free, and you can find out more from our recommended gear section.
Time to Look into Acoustic Treatment for Your Home Studio
When you’re busy writing and recording tracks, deciding which equipment to buy, and how you use it all to make the best productions, you can forget about things like acoustic treatment.
Hopefully, this brief introduction has helped to show that it acoustic treatment can be important, and that there are some basic steps that you can take to get started.
