How to Make a Vocal Chain for Music Production: A Beginner’s Guide
Even if you’re just starting off in music production, you’ve probably heard the term vocal chain.
But what exactly is a vocal chain? That’s what we’re going to explore in this article.
We will also have a look at how to make a vocal chain for your own music production, and vocal chains that you can buy ready-made.
Vocals are Extremely Important
The vocal is usually the most important part of a music production. The vocal captures the listener’s interest, even if nothing understandable is being sung.
Recording vocals is challenging, and can lead to disappointing results.
This disappointment is often due to the recorded vocal performance not sounding they way you want, usually because it doesn’t sound like professional vocal recordings.
This problem can often be solved by introducing a vocal chain into the process.
Including a strong vocal chain in your recording and mixing process is essential for achieving a polished, professional sound in your music.
Using the right audio processors in the right order can bring out the best in your vocal recordings specifically, and your music productions in general.
Whether you’re an experienced producer or you’re just starting out, understanding the basics of vocal chains can help take your music to the next level.
What is a Vocal Chain?
The first thing to do is define what we mean by a vocal chain.
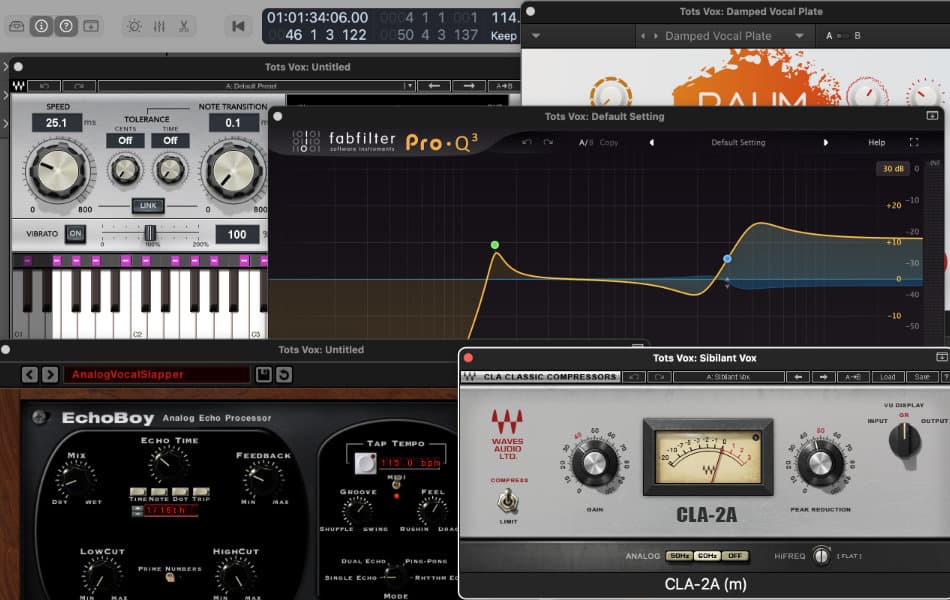
A vocal chain is a series of audio effects processors used to enhance and optimize a vocal recording. The vocal chain will include audio effects processors such as tuners (e.g. Auto-Tune), EQ (equalization), compressors and reverb (among others).
This series of audio effects processors is used to enhance and refine the sound of a vocal recording.
Each of the audio effects in the chain performs a specific function. The effects modules are usually applied in a specific order to the vocal recording to achieve the desired sound.
As outlined above, some effects modules that are commonly used in a vocal chain include:
- Tuning: The tuning module is used to correct any pitch issues in the vocal recording. It can be done manually or with the help of software like Auto-Tune.
- Equalization (EQ): EQ is used to adjust the tonal balance of the vocal recording. It can be used to boost or cut certain frequencies to make the vocal sound more interesting, or to remove unwanted frequencies.
- Compression: A compressor is used to control the dynamic range of the vocal recording. It can be used to make the vocal sound more even and consistent, and reduce unwanted variation in volume. The compressor can also enhance the presence of the vocal performance.
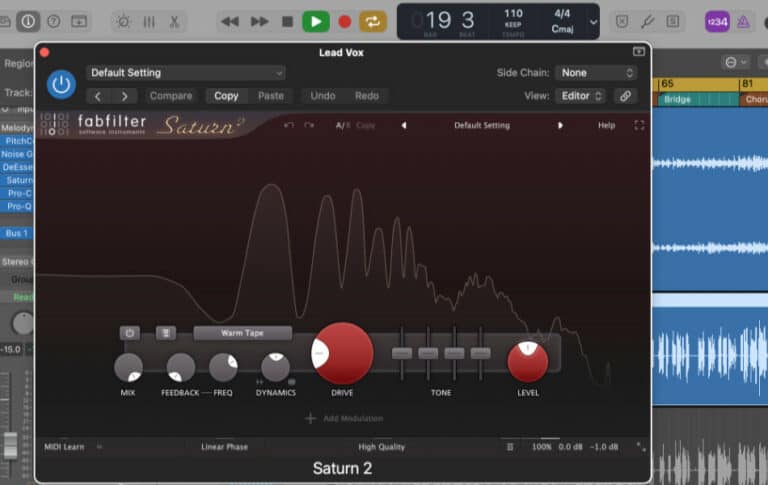
- Saturation: This is used to add warmth and character to the vocal recording. Saturation helps to emulate the sound of analog recording equipment by adding subtle distortion to the vocal.
- De-Essing: A de-esser removes sibilance (unpleasant s-sounds) from the vocal.
- Excitement: An exciter is used to add brightness and clarity to the vocal performance. It also helps to bring the vocal forward (enhancing presence) in the final mix.
- Upward Compression: This can help to increase the volume of quieter parts of the vocal. Making the quiet parts louder helps to even out the vocal performance and add presence.
We will look at some of these effects processors in more detail later.
Care is needed when applying these effects to a vocal recording to avoid over-processing. However, the amount of processing would actually depend on the type of vocal you are trying to achieve.
For example, a vocal in the style of Adele might need a very different combination of audio effects when compared to the vocal on a Daft Punk track.
This brings us to another question. At what point do you apply the vocal chain? Is it part of the recording process or part of the mixing process? It can be either (or both).
Components of a Vocal Chain
So a vocal chain is a series of audio effects processors used to enhance a vocal recording.
One way to understand the components of a vocal chain is to look at what’s included in a pre-built chain. One of the most popular all-in-one vocal chain effects plugins is CLA Vocals from Waves.
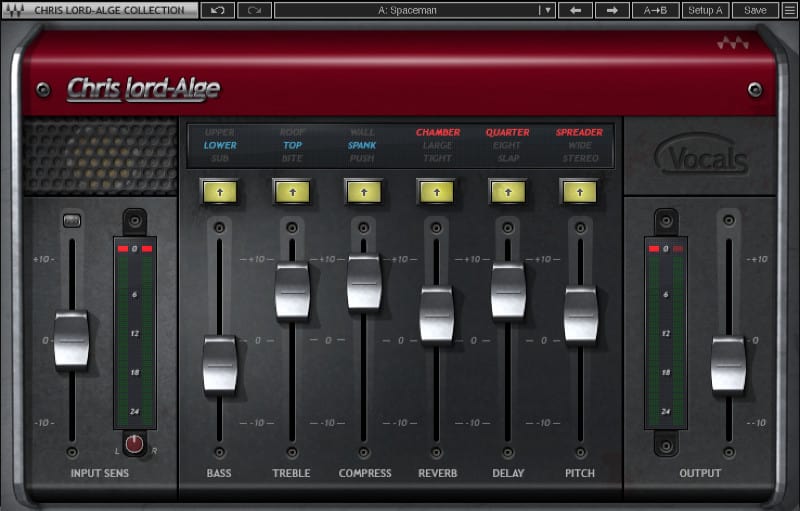
The CLA Vocals plugin includes several of the vocal chain elements we have already mentioned. This plugin is often applied while recording to get a good initial vocal performance.
It’s not unusual for producers to deactivate the plugin later and apply more sophisticated vocal chain effects to the audio recording.
We’ll start on the left look briefly at each part to see why it’s there.
Input Sensitivity
First on the left is the input sensitivity control (Input Sens). This is an important aspect of vocal (and audio in general) recording, since helps to make sure that the vocal is being recorded at a good level. The LED scale is used to check the input level.
You could also adjust this level using the controls in your audio interface, or the input gain control in your DAW (if it has one).
If the level is too low you will probably have to turn up the gain of the recorded audio, which can introduce a lot of noise in your vocal.
If the level is too high the recorded audio will be clipped, meaning that the signal will have digital distortion applied, which sounds bad.
You can also use the knob at the bottom, labelled with L and R to balance the left and right channels of a stereo recording.
Bass and Treble
EQ (equalization) can be applied using the Bass and Treble controls. This lets you increase or reduce the level of low and frequency sounds within the vocal.
Although there are only two controls, a selection of frequency ranges (Bass Color and Treble Color) can be selected using the buttons near the top of the unit.
Compression
Compression can be applied to the vocal using this control. Compression makes a vocal sound more balanced and even by lowering the level of the louder parts and raising the level of the quieter parts.
This process is usually described as controlling the dynamic range, and this can make the vocal sound louder and more present (closer to you).
In addition to adjusting the amount of compression applied, you can also choose the type of compression (e.g. adjusting threshold and ratio) using the button near the top of the unit.
Reverb
Reverb is one of the audio effects most often requested by vocalists. Reverb makes the vocal sound richer, and almost always better.
You can apply more reverb using the slider. The button above the slider lets you choose the quality of the reverb effect in terms of the size of the space being simulated.
Delay
Whereas reverb applies lots of little echoes that simulates the vocal reflecting off the walls (and floor and ceiling) of a room, delay applies clear echoes to the sound.
Again, you can adjust the amount of delay applied to the vocal. This is a bit like the wet/dry control on a stand-alone delay plugin.
The button above the slider selects the type of delay, i.e. slap delay (very short delay), quarter note or eighth note delay.
Pitch
The pitch control sometimes catches people out. Since tuning (e.g. Auto-Tune) is often included in a vocal chain, you might think that pitch has something to do with that.
However, pitch actually provides modulation to the audio. It can apply a doubling effect to make the vocal sound wider, and can also apply some chorusing too.
The type of modulation can be chosen using the button above the slider.
Ready-Made or Custom Vocal Chain?
Having looked at Waves CLA Vocals you might decide this is all you need for your vocal chain.
Certainly, a lot of people use CLA Vocals when they are recording vocals, or even writing the vocal part for a song or track.
Hearing the sound of your own (or someone else’s) dry vocals can be quite off-putting, and definitely not inspiring during the creation of a new song.
For example, as part of Ryan Tedder’s songwriting process, he sings and records the melodies and rough lyrical ideas on the fly.
I have seen him talk about how he always uses CLA Vocals when recording so that he’s a bit happier with the sound of his vocal while he is writing. BTW, I believe the CLA Vocal preset he uses is Face 2 Face Dry.
You might not want to use Waves CLA Vocal, or any other pre-built vocal chain, and prefer to set up your own.
However, having looked at this Waves plugin we have a good idea about what needs to be included. Also, there are some additional components that we could add.
Fortunately, most DAWs come with some, or all, of the elements needed for your vocal chain.
Making Your Own Basic Vocal Chain
When looking at the CLA Vocals plugin, we saw how important it is that the signal being recorded is at the right level.
If the level is too high you get clipping distortion. Too low and you have to increase the gain of the recorded audio, which introduces noise.
Normally, you would adjust the level of the signal coming into the DAW using the gain controls on your audio interface. There is usually some type of level indicator on the audio interface to guide you.
You can monitor the level of the incoming signal using the track level meters in your DAW. The most common recommendation is to keep the peak level (when singing the loudest parts) below -6dB, and ideally around -12dB.
It’s important not to let the levels get any where near 0dB, because it’s at this point that digital clipping distortion becomes a big problem. Once you have recorded the distorted audio there’s not much you can do to fix it.
Pitch Correction (Tuning) Plugins
There is quite a lot of disagreement about the order in which you should place the vocal chain components. However, I notice that most people agree that the vocal tuning plugin should come first.
The reason for placing the tuning plugin first is that it responds better to an untreated signal, and then the tuned vocal can be processed by the rest of the vocal chain.
The purpose of the tuning plugin is to catch notes that aren’t quite in tune and pull them closer to (or completely into) the correct pitch. This pitch correction can make a huge difference to a vocal performance right away.
Something to note is that often there is very little pitch correction applied to the vocal, and the tuning plugin is included because what it adds (in addition to tuning) has become part of the sound of modern vocal recordings.
The best known pitch correction software is probably Auto-Tune from Antares. In fact, Auto-Tune has become the generic term used for any kind of tuning effect, regardless of the software that’s doing the tuning.
Some versions of Auto-Tune are quite expensive, but you can buy a cheaper version, Auto-Tune Access, for around $49. Some people like the simplicity of Auto-Tune Access, whereas others complain that it have very few features for the money.
Waves also do a real-time pitch-correction plugin called Waves Tune Real-Time. This can be quite inexpensive (you need to look out for Waves plugins being on sale), and enables you to control several aspects the vocal tuning process.
Some DAWs include pitch-correction plugins so you could use those instead. For example, Logic Pro X comes with a tuning plugin called Pitch Correction, which is pretty good.
Ableton Live doesn’t come with a pitch-correction but you can obtain free Max For Live devices, like Auto Tune from Beat Lab, that do the job really well.
Offline Pitch-Correction
It’s worth noting that the pitch-correction software discussed above lets you correct the pitch of the vocal performance in real time. This can be quite helpful in a recording session so that the singer feels good about their performance, and the producer can hear that the final vocal will be in tune.
There are other pitch-correction software applications that are more intended to process the vocal performance after it has been recorded. The audio procession applications usually also include the ability to correct the timing of a vocal performance too. This means that sung notes can be pulled closer to (or right onto) the beat.
The best known example of this type of software is probably Melodyne from Celemony, which sometimes comes bundled with the more expensive versions of some DAWs. Some DAWs include their own software, like VariAudio, which comes with Cubase Pro.
Compressor
Something that music producers often disagree about is whether Compression should come before EQ (or the other way around) when processing audio. This argument applies to vocal chains too.
I have read a lot about this, and done various experiments, and I have decided to go with Compression first. Next week I might decide to go with EQ first, so maybe it’s not that important.
Having said that, several compressors have EQ built in (FabFilter Pro C2, for example), so some EQ can be applied before compression inside the plugin.
A compressor is sort of like an automatic volume control. When the volume of the vocal gets above a particular level (the threshold) it’s automatically turned down. The amount it’s turned down depends on a setting called the ratio.
A ratio of 1:1 means it’s not turned down at all. A ratio of 2:1 causes it to be turned down to half way between its volume and the threshold. A ratio of 3:1 causes it to be turned down to a third of the way between its volume and the threshold. And so on.
This makes the overall volume quieter, but then the overall volume is turned up to where it was before the compression was applied. This brings the volume of the quieter parts of the vocal up and closer to the level of the louder parts. The result is a reduction in dynamic range, and the affect on the vocal is that loud and quiet parts are evened out and the vocal sounds as if it’s closer to you (presence).
Normally, only a little bit of compression is applied in a vocal chain so that the vocal sounds natural.
Compression amount is often stated in terms of gain reduction, and around 3dB of gain reduction is usually enough. You should be able to monitor this using the meters on the compressor.
You can read more about how audio compression is used in music production in another article on the website.
EQ (Equalization)
The EQ component allows you to balance the different frequencies in the vocal performance. One way to think of it is that you are trying to add a bit of life to the vocal.
Depending on whether it’s a male or female vocal performance, you may want to focus on different frequencies.
One thing that is usually recommended is to roll off the low end. This means that you should apply a high-pass filter (sometimes called a low-cut filter), which is often included in the EQ plugin.
The filter is used to cut out low frequencies below around 90Hz. This low-cut filter is usually applied to most other instruments in a track mix to avoid the all the low frequencies interacting and clashing.
Another frequency range that’s often the focus of EQ is the area that makes the sound muddy. This frequency range is generally between 200Hz and 500Hz, and those frequencies are often scooped out (levels reduced) to remove these muddy or boomy sounds.
The third frequency range to look at is right near the top of the frequency range. Boosting levels here (with a high-shelf setting) can add some air or shimmer to the vocal performance.
You can read more about equalization in our article on why EQ is important in music production.
Saturator
Saturation is the effect that I have found, unexpectedly, to have one of the biggest effects on the sound of a vocal.
Saturation add a type of distortion that makes the sound of the vocal richer. It does this by adding harmonics that make things sound warmer (for want of a better word). This can help to give the vocals a more vintage or analog sound (which people usually like).
This audio effect also seems to remove rough edges from the vocal performance too. This is probably due to the addition of harmonics as mentioned above, together with the compression that is applied in the saturation process.
You can read more about audio saturation in another article on the website.
De-Esser
Something that wasn’t included in the CLA Vocals plugin is a de-esser. A de-esser is a kind of compressor that specifically compresses (or reduces the level of) audio frequencies withing the sound of the letter S.
This S-sound is referred to sibilance, and it can make a vocal sound quite unpleasant if it’s not treated.
In the section on EQ above I mentioned emphasising high frequencies to give the vocal some shimmer (or sparkle, even). This process can also introduce a lot of sibilance, and the de-esser plugin can help to remove it.
Delay
Delay effects cause echoes to be added to the sound. The amount, and type, of delay applied would depend on the type of vocal being recorded.
The two main controls on a delay plugin are the time and feedback controls.
Time allows you to adjust the time between the original sound and the echo. So the echo can follow directly after the sound or a little later as the time control is turned up.
Feedback lets you adjust how long the echoes continue. The lowest setting might only allow one echo, and as you turn up the level the echoes go on for longer before dying out.
The other settings on delay plugins usually control how the echoes sound. This usually includes echoes that sound just like the original signal, to echoes that are quite distorted to mimic old tape echo or transistor echo units.
In most situations the amount of delay would be quite small since with larger amounts the echoes can quickly build up, making the vocal sound unpleasant.
Reverb
Reverb adds ambience to a vocal, so that it sounds like the vocal is being delivered in a real space with reflective walls.
Reverb is the effect that vocalists most often ask to be applied when they are trying to make their vocals sound better.
Adding the reverb after the delay effect means that echoes in the vocal sound as if they are reflecting off some surfaces, which adds more interest to the performance.
Within a vocal chain, the amount of reverb added is usually fairly subtle. One reason is that reverb applied to a complex sound like a vocal, can easily become a wash of sound very easily. This can result in a loss of definition in the performance.
Two of the main controls in a reverb plugin are the size of the reverb space and the amount of reverb applied.
The size of the space is often stated using terms like, Room, Hall, Cathedral and so on. Often, the way to work with reverb is to choose a setting (or preset) based on size of space, then reduce the amount of reverb (often expressed as a percentage) until it sounds cool.
Other Links in the Vocal Chain
There are numerous options when it comes to plugins that can be included in a vocal chain. Others I mentioned in the outline at the start of the article include Exciters and Upward Compression.
These additional options are probably more frequently used during the mixing process after recording has been done, rather than during the vocal recording. That’s what I was really thinking about here.
Vocal Chain: During Recording or Later When Mixing?
Whether the vocal chain is used during recording or later during mixing, or more likely both, is an important issue.
During recording, the vocal chain can be used to inspire the vocalist and make them feel better about their performance.
It’s not unusual for the headphone mix the vocalist hears to include the effects in the vocal chain, while the producer is listening to the raw vocal.
It’s important to remember that you can disable the vocal chain plugins after recording to leave the raw vocal. A different vocal chain can be applied to this vocal, which includes more or different plugins to achieve the vocal sound for the final mix.
For this reason you should ensure that you are recording the clean vocal, and that the vocal chain effects are applied to this recording.
You don’t really want to be stuck with only a version of the vocal recording that includes the effects, and that these can’t be removed when you don’t want them there.
