What Is EQ and Why Is It Important in Music Production?
You have probably heard people talking about “EQ” in relation to music production. They talk about “rolling off” low frequencies, and making the individual parts “sit nicely” in the mix, but what does all this mean?
There seems to be quite a lot of information available on how to do EQ, but I wanted to take a step back and find out a little more about what it actually is and why it’s so important.
What is EQ and why is it important in music production? EQ is short for equalization. An EQ device lets you can turn the level of specific frequencies within an overall sound up or down. This lets you choose specific frequency ranges for the elements of your mix so that they occupy their own space and don’t interfere with one another.
EQ, as you may already know, is short for equalization. The name suggests that when you do EQ you are balancing something or making things “equal”.
The things that are being “equalized” are all the various parts of your music production so that they sound good when mixed together.
One of the important things to understand is that instruments and vocals that sound great on their own can start to sound very messy when mixed with other instruments and vocals (that also sounded great just on their own too).
What Is Actually Being Equalized?
The EQ device, which could be hardware or software, lets you select specific frequencies so you can turn the volume of the sound at those frequencies up or down.
This means that you can make sure only the most important sound frequencies of any vocal or instrument are preserved, or even boosted, while reducing any frequencies you don’t want to hear.
Sound Frequency Bands
When music producers talk about sound frequencies as they relate to EQ they either talk in terms of actual frequencies or in terms of frequency bands that relate to the frequencies. Simple examples of this would be low, mid or high frequencies, but it’s usually broken down into more bands.
The frequency of sound waves is measured in Hertz, usually abbreviated to Hz, which relates to the number of wave cycles per second. For example, 100Hz is 100 wave cycles per second.
Humans can hear sound within a range of frequencies. The lowest frequency humans can hear is around 20Hz, and the highest is around 20,000Hz, or 20kHz.
The table below shows the range of audible frequencies. This has been broken down according to the terms that music producers often use to refer to the smaller ranges of frequencies within the full range.
Main Subdivisions of the Audible Frequency Range
Bass: 20Hz to 300Hz
Midrange: 300Hz to 5kHz
High-End: 5kHz to 20kHz
Different sources call these bands by different names, and the ranges may vary. Also, High-End is sometimes referred to as “Treble”.
Further Frequency Subdivisions
These main frequency bands an be broken down into further subdivisions.
Bass
Deep Bass: 20-40Hz
Low Bass: 40-80Hz
Mid-Bass: 80-160Hz
Upper Bass: 160-300Hz
Midrange
Lower Midrange: 300-600Hz
Middle Midrange: 600-1.2kHz
Upper Midrange: 1.2kHz-2.4kHz
Presence: 2.4kHz-5kHz
High-End
High-End: 5kHz-10kHz
Extremely High-End: 10kHz-20kHz
It’s a good idea to at least be aware of these frequency subdivisions as producers often refer to them like this, in addition to talking about the actual frequencies.
Voices and Instruments in Each Frequency Band
Vocals and various instruments used in music production can cover quite a wide range of frequencies. This is why EQ is needed when mixing a track.
There will be a key part of the sound of the vocal or instrument that you want to keep, or even emphasize, in your track. This part of the sound will be within a fairly small frequency range, and you will want to boost the level of sound within this range.
However, the sound of the voice or instrument will also include a range of frequencies that you don’t want. It’s these frequencies where you want to cut the level of the sound so that they can’t be heard.
For example, a kick drum can go from around 60Hz for the “thump” of the drum up to around 4kHz for the “attack” of the drum. The job of the kick drum is usually to provide low end thump, but you don’t want the higher frequencies interfering with other instruments.
To do this you would apply EQ to the kick drum track and reduce the level of the higher frequencies, while maybe boosting the level of the lower frequencies to emphasize the “thump”. Now you have the kick drum “sitting nicely” in the mix.
As another example, the frequency range for a female vocalist would be from around 200Hz to around 1.5kHz.
You would still want this vocal to “sit nicely” in the mix, but because the vocal is often the main focus of a song or track you will probably want to make it stand out more than sit down.
One way of doing this would be to cut the low frequencies, which in this case are around 200Hz and slightly upwards. To make the vocal cut through the rest of the sound in the mix you could boost the higher frequencies, which would be those between around 1.2kHz and 1.5kHz.
If you were to listen to this vocal on its own after the EQ had been applied it would probably sound quite thin, and maybe even a bit shrill. But in the overall mix it will sound good as it occupies its own frequency space and doesn’t interfere with the other parts in the mix.
Graphic and Parametric Equalizers
You may remember record players, cassette players and CD players that had a graphic equalizer that let you adjust the sound to the way you liked it.
In a graphic equalizer each of the sliders represented the levels of various frequency bands, starting with the lowest bass frequencies on the left and going up to the highest treble frequencies on the right.
Graphic equalizers used to be common in recording studios, and producers would use them to cut or boost the frequencies of various vocal and instrument tracks.
Nowadays you are more likely to see, and be using, a parametric equalizer. One of the advantages of a parametric equalizer is that it lets you choose the frequencies that you want to manipulate. With a graphic equalizer you were stuck with the frequency bands that the manufacturer had chosen.
Parametric Equalizer Controls
A parametric equalizer usually lets you control three main parameters, which is why it is called parametric.
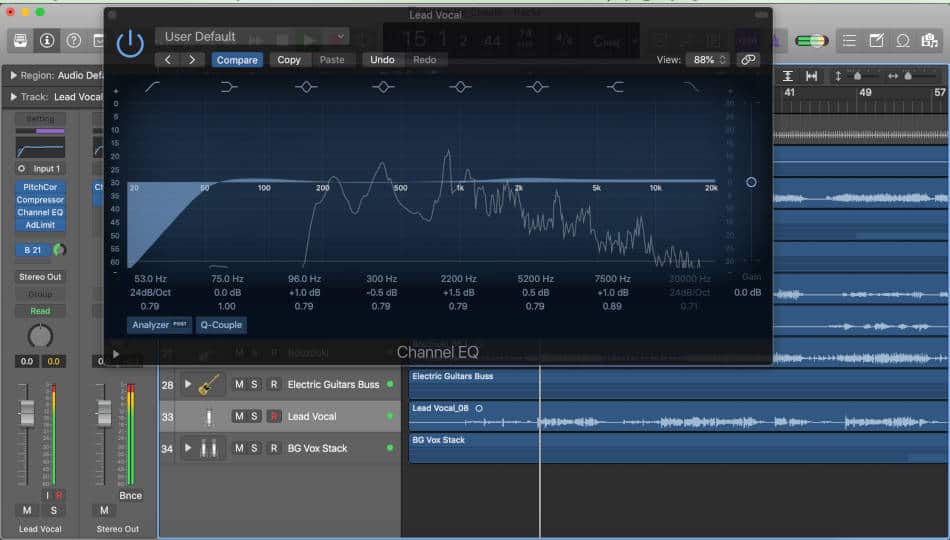
The parameters normally controlled are centre frequency, gain and bandwidth.
The center frequency is the frequency within the sound of the voice or instrument that you want to manipulate. Some EQ devices let you choose a number of frequencies so that you can control a range of frequencies for the sound. Others only let you choose one frequency.
The gain control lets you turn up (boost) the level of sound at that chosen frequency, or turn down (cut) the level of sound at that frequency. EQ devices that let you control a number of frequencies have separate gain controls for each frequency chosen.
Bandwidth is usually referred to as “Q” and it confuses a lot of people. This lets you control how wide or narrow the effect of the gain control is.
For example if you boost the gain with a high Q setting you will see a narrow peak with steep sides either side of the center frequency. If you boost the gain with a low Q setting you will see a wide peak with shallow sides either side of the center frequency.
Turn It down Rather Than Turning It Up
When you start to mix your tracks it can be tempting to start raising the volume levels of voices and instruments until everything is so loud that you end up having to turn it all down and start again. It’s a similar situation with EQ.
Boosting the levels of various frequencies can have an immediate impact and make you feel that you are making some significant changes to the sound. The problem is that you can end up having to boost everything until the sound becomes messy and you have to start again.
For this reason it’s often recommended that when you are applying EQ you should begin by cutting the levels of unhelpful frequencies rather than boosting things you want to hear more of. This is called subtractive equalization.
We saw this in the earlier example of kick drum and female vocals. Frequencies that were less important to those elements were removed so that other parts of the mix could fill those frequency spaces, leaving the kick drum and vocal in the spaces we want them to occupy.
It’s only now that I have spent some time trying things out with EQ that I appreciate how powerful it can be. Unlike some other effects it is quite subtle, so you have to spend some time making adjustments before you start to hear what a huge difference it can make to the overall mix.
