How to Prepare Your Tracks for Audio Mixing: A 5-Step Guide

Once you have recorded the individual tracks in your audio production it’s time to mix the tracks into the finished piece of music. One thing that’s often neglected is preparing the tracks properly to get them ready for the mixing process.
Mixing involves making adjustments to the sound of each track to make sure it is doing its job properly in the final mix. The mixing process helps to blend the tracks together in a cohesive way.
You need to adjust to levels of the the individual tracks, position each track in space (back and forward, left and right) and apply any effects that are needed.
To be able to mix your tracks effectively it’s helpful to prepare them before you start the mixing process. Mixing can be complex, and proper preparation helps to avoid making the process more complicated than it needs to be.
Mixing the Tracks Yourself or Someone Else Doing It?
Whether you are doing the mixing yourself, or you are sending your recorded tracks to someone else to be mixed, you should be preparing your tracks properly.
If you are taking care of the mixing yourself then preparing your tracks in advance will be very helpful. If you are sending your tracks to be mixed by someone else it may be essential, since the mix engineer might not accept them if they aren’t provided in an appropriate way.
5 Steps To Prepare Your Tracks for Mixing
Before we move on to talk about the individual steps in the process, here’s a summary of what we will be looking at:
- Organize Your Tracks
- Group Your Tracks
- Avoid Clipping and Digital Distortion by Gain Staging
- Bounce Midi Tracks to Audio
- Trim Your Tracks
1. Organize Your Tracks
When you are trying to be creative it can be tempting to just get on with it, and audio mixing is a very creative process. You probably want to get straight into adjusting levels and adding various audio effects to see how it affects the sound.
We have a beginner’s guide to audio effects processors in this article.
However, you can get in a mess if you don’t get your tracks organized first. Basic “housekeeping” tasks might not be very high on your list of priorities as a music producer, but it’s an essential part of producing a good mix.
When you are recording your audio and midi tracks they are often added in a fairly random order. After the basic rhythm, chord and melody tracks are laid down, the tracks that come later might have been added one at a time as you thought of things that might help the production along.
The result is that you have a number, probably a large number, of individual tracks of different types and it can be very difficult to make sense of them.
This is the time when you need to look carefully through all the individual tracks and see what you have.
Name Each Track
You may find that some of your track names aren’t very logical, making it difficult to understand what you are dealing with. You may have recorded some of the tracks a while ago, and it’s possible you will have forgotten what they are and what their purpose was.
For example, if you have been importing audio clips into your production these tracks may be named after the audio clips they contain. For example, “008-trig-320-138bpm-dry.wav”, or something similar.
It’s much better to give the track a descriptive name, such as “Main Drum Loop”, so that it’s clear what you are dealing with without having to listen to the individual tracks every time to see what they are.
Similarly, tracks that use a virtual instrument plugin may be automatically named after the instrument. For example, “Sylenth1”, “Kontakt”, or whatever instrument you are using.
Much better to call it, “Synth Lead”, “Funky Bass”, or something that makes it clear what this track actually is. It also tells you about the purpose of the track in the overall piece of music.
Color-Code Your Tracks
Once you have named your tracks, so that you can understand why they are in your production, it’s a good idea to color-code them.
Before you start to color the tracks you should decide on a logical way to categorize them. For example, you might have a number of synthesizer tracks, so you could put them in the synthesizer category.
Or, some of the synthesizer tracks might be bass tracks, some might be lead tracks and others might be arpeggiated tracks, so you might want to categorize them like this instead.
There aren’t really any rules about how to choose the categories to put your tracks in. However, it does need to make sense for the piece of music that you are producing.
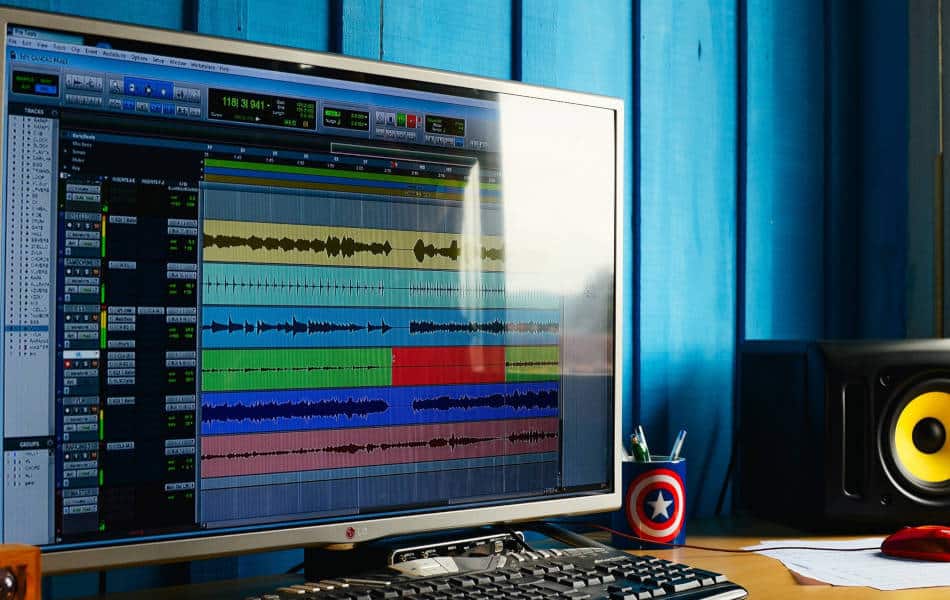
Choose a particular color for each type of track. For example, you could color all the drum tracks red, the bass tracks blue, the vocal tracks purple, the guitar tracks green, and the special effects tracks yellow.
Within those broad color-categories you could also have shades of the particular color for sub-types of function, instrument or sound.
Add Section Markers
The final part of organizing your tracks is to add section markers to the project window. These markers are called different things in different DAW software, but the purpose is usually the same. It’s to let you indicate where things like the introduction, first verse, pre-chorus, chorus, bridge and the drop are in the timeline of your arrangement.
2. Group Your Tracks
Now that you have decided on a logical way to categories the tracks in your production, and color-coded each category, you can start to organize your tracks into groups.
Having the different types of track color-coded means that it is easy to see “which is which” in the project window of your DAW software. Now it’s an easy job to drag the tracks of each type so that they are all sitting together in the project window.
There are no hard and fast rules about the order in which your track categories should appear in you DAW, but often people have drums first (or at the top in most DAW software), bass below that, then lead instruments, vocals, special effects, and so on.
Now that you have the various types of track (drums, bass, vocals) sitting together in your project window you can assign them to groups. Here, the grouping relates to the ways that individual tracks can be assigned to groups of various types in the DAW software.
Different DAWs have different ways of grouping tracks, so you will have to check how it is done using your music production software. Some DAWs use words like “stacks” or “folders” to refer to the groups and there are some slight differences in the way they work.
There are two main benefits that come from grouping your tracks like this.
The first is that once the individual tracks have been assigned to their respective groups you can collapse the tracks down and just show the group when you don’t need each one to be visible.
This saves space in the project window as each group will now appear like a track of its own (but containing all the tracks in that group). Whenever you want to work on individual tracks within a group you just open up the group to make the individual tracks available.
The second benefit is that you can make adjustments to volume levels, add and adjust effects, and control routing for the group as a whole.
However, each track in the group will still have its own channel in the mixer, complete with fader control and slots for effects and routing. This means that you can manipulate the controls for the group of tracks as whole, as well as being able to do the same thing for the individual tracks within each group.
You will need to take care with this if you are going to send your tracks out for someone else to mix. If they use different DAW software the grouped tracks may not open properly on their computer.
3. Avoid Clipping and Digital Distortion by Gain Staging
When recording individual tracks the level of the audio signal is often quite a lot higher that it will end up being in the final mix. Also, when you are recording MIDI using an instrument plugin you may be focused on the sound of the instrument without thinking about how it might fit into the overall mix.
It’s at this stage that you need to start thinking about what each track contributes to your production and how loud each track needs to be in the mix. Also, it’s the time to think about where each track, or group of tracks, needs to sit in the stereo field.
You are not trying to set the final levels at this stage. Just create a rough mix so that you can make decisions more easily later about how the final mix will sound.
Since you may have recorded your tracks individually or in groups, you might not have been watching the overall level of the mix in the final output. This means that when you play the tracks all together the output level from the combined tracks may be too high, which can cause problems.
Clipping and Digital Distortion
As you probably know, in a digital system you need to avoid the level going above 0dB to avoid the signal “clipping”, which can result in unwanted distortion.
For this reason you need to turn down the volume levels of the tracks to achieve a balanced sound and keep the level at the stereo output below the clipping point.
If you end up making it too quiet you can always increase the level of the final audio file later, but you won’t be able to remove digital distortion from it once it is in there.
The scale used in digital systems is dBFS, where FS is short for Full Scale, but it’s usually just stated as dB. The recommendation with a digital audio system is usually to make sure the levels are below -18dBFS, since this is equivalent to 0dBVU, which is how it’s measured in analog systems.
We’re just trying to prepare the tracks for mixing, so we aren’t going to worry too much about this. The levels can change when effects are applied later in the mixing process, so more exact levels can be set then.
Adjust Levels Going into the Mixer
Play your mix while looking at the level meters in the mixer console window of your DAW. If any of the individual meters in the mixer are going into the red you should adjust the level until it is no longer showing red.
Since you would hopefully have set the recording level correctly when you recorded your audio tracks, these tracks probably won’t be going into the red. It’s more likely to be virtual instrument plugin tracks that are doing this.
Turning down the fader in the mixer console for these virtual instrument tracks probably isn’t going to help, since this only adjusts the level before it is sent to the next stage rather than controlling the level as it comes in.
You will need to adjust the output of the virtual instrument itself. Open the editing window for the relevant instruments and turn the volume down until the level meters no longer go into the red.
Another way of doing this, which would also work for your audio tracks, is to adjust the “pre-fader gain” control. This reduces the level of the signal coming in to each track’s channel in the mixer.
Have a look at the manual for your DAW software for instructions on how to do this in your set-up, since it’s different for each one.
Check Levels in the Final Output
Now check the level meter of the stereo output track for the arrangement as a whole as it plays all the way through from start to finish.
At any point does this level meter go into the red? The level of this meter should not go above 0dBFS. This is when the meter goes into the red and “clipping” may occur, which is when digital distortion may be introduced into the signal.
If the level in the stereo output meter is above 0dBFS turn it down until it is just below the the clipping level during the loudest part of the arrangement.
It may be that the level in the stereo output meter is some way below the clipping level during the loudest sections of the arrangement. If so, you can turn up the fader for the stereo output until it’s just below the clipping level at the loudest points.
4. Bounce Midi Tracks to Audio
Now that you have made level adjustments to the output from virtual instruments on MIDI tracks you can convert them to audio files. This is sometimes referred to as bouncing, or rendering, the tracks to audio.
Before you do this you should be sure that you are happy with the final sound of virtual instrument track. Once it has been converted to an audio track you won’t be able to access the instrument controls any more.
There are a couple of advantages to rendering your MIDI tracks to audio. The first is that it helps you to commit to the sound of the track and avoid going back to make (probably) unnecessary adjustments to the instrument. The second, and most important, is that it helps to reduce the demands placed on your computer.
Virtual instruments can use a lot of computer resources, and your computer only has so many available. If you are mixing a number of tracks that use virtual instruments you could get to the stage where your computer runs out of processing power.
Also, when you move on to the later stages in the mixing process you will be using effects processors to apply things like EQ (equalization), compression, reverb and saturation. Each of these effects will also use computer processing power.
Audio tracks use much less computer processing power than MIDI tracks. Rendering your MIDI tracks to audio frees up a lot of computer resources that can be used by effects processors during the mixing process.
Most DAW software will enable you to render the audio tracks right next to the original MIDI tracks in the project window, and gives them a similar track name.
Once this is done, disable each MIDI track so that it isn’t using computer resources. Leave the disabled MIDI tracks in place so that they will be available and easy to find if you need to go back to them.
5. Trim Your Tracks
The audio tracks in your production probably start at the beginning of your piece and continue right until the end, or near the end. This isn’t necessary, or even desirable.
In an audio track in places where there is no vocal or instrument playing there is normally supposed to be silence. However, you can still have noise present in these sections that are intended to be silent.
When you have a number of tracks playing together this background noise can add up and become quite noticeable. It is possible to remove, or minimise it, using audio effects or automated volume drops, but it might be easier to remove these sections altogether.
This trimming can be done easily by cutting the track and deleting the unwanted sections. These sections can be in the middle of the audio tracks or at the beginning of end of the track.
You should probably only trim your audio tracks like this if you are going to mix them yourself. It’s difficult to send the separate multitracks out for someone else to mix if some of the tracks are chopped up like this.
And You’re Ready to Start Mixing Your Tracks…
So now you have prepared your tracks properly you are ready to start the mixing process for real. The next stage involves adjusting levels, making panning adjustments and applying audio effects.
You might be doing the mixing yourself, or someone else might be doing it, either in your studio or somewhere else.
Either way, mixing your tracks will be a lot easier if you have prepared them properly in advance, and we hope this guide helps you to do that.


